
Did you know that 90% of women are affected by cellulite?
And 10% of men, but do we really need another reason to hate on men?
Didn’t think so, so we’ll get back to the ladies.
90%!
That means that MAYBE 1 person you see in a day DOESN’T struggle with cellulite.
Now back up a minute, you might be wondering what CELLULITE is.
Cellulite is more commonly referred to as:
- Cottage Cheese
- Hail Damage
- Orange Peels
- Lumpy Gravy
- Tinglefat (Okay, so I’ve never heard anyone call it tinglefat, but it came up on Google and I cannot stop giggling).
Basically, it is the worst possible thing a woman can see on her legs, specifically on the back both on and below the booty.
HUNDREDS of females have asked how to get rid of it because they’re embarrassed to wear shorts, tight pants, dresses, skirts, and don’t even get me started on swimsuits.
So, how does one get rid of tinglefat (okay, how do you NOT laugh at that!?)?
Unfortunately, you can’t.
BUT WAIT! Don’t close this tab and start cursing my name!!
Give me a chance to explain.
Your cellulite cannot be completely demolished.
Even if you use those ridiculously expensive fat sucking procedures (cool sculpting, liposuction, etc.).
BUT, we CAN change what’s underneath the cellulite and shrink what’s beneath it so it doesn’t push so aggressively against the skin!
That means you need to train butt and the back of your legs, regularly.
You need to push yourself,
Challenge yourself,
And test your limits.
But, you needs to be done in the proper way.
So, here are the Top 7 Exercises for getting rid of that tinglefat.
Deadlifts
The deadlift is one of the oldest exercises in the books.
Long ago it was one of the truest tests of strengths and remains as such today!
While it’s still used as a test of strength today, many now use it because of its ability to SHRED your hamstrings (the backs of your legs).
Watching someone deadlift you think it’s as simple as picking something up off the floor; however, it’s one of the trickiest of all lifts both in technique and CNS fatigue management.


As you can see in the picture, I’ve already performed the hip hinge to bring myself to the bar. My feet are firmly placed on the floor at a shoulder-width stance. (NOT PICTURED). My shoulders are directly above my arms, hands, and the bar. My head is in a neutral position, and my spine is within the neutral range. In the second picture, you can see I’m at the top position of a deadlift. My hips are at full extension, my shoulders are locked and resting in their end position, and my chin is pulled back to maintain my head in the neutral zone.
Check out a video demonstration of a Stiff Leg RDL by CLICKING HERE!
Now because this video does not include sound, here are some important coaching cues you’ll want to keep in mind as you incorporate this exercise:
- Position your feet in the stance of your choice (the wider your foot position, the more your feet turn out).
- Use a grip of your choice (overhand, over/under, or hook grip).
- Push the hips back and maintain the shins in a vertical position to reach down for the bar.
- Keep the bar within an inch of your legs throughout the entire movement.
- Pull up on the barbell, brace your spine, and put tension through your posterior chain.
- Extend your hips and knees at a similar rate as you rise upward.
- Reach full hip extension with a slight glute squeeze in the top position.
One of the reasons the deadlift is so great for getting rid of your cottage cheese thighs is the variance of the exercise. Check out all of these deadlift variations:

Good Mornings
Deadlifts might be the best exercise for shredding your cottage cheese thighs, but they’re a very technical exercise that requires a lot of practice and coaching.
One of the best ways to practice and build the technical skill for deadlifts is through the exercise known as Good Mornings, which just so happen to be the second-best exercise for shredding your cottage cheese thighs!
Good mornings have received a bad rap over the years because done incorrectly they can SERIOUSLY injure the back.
Well, that can go for just about any exercise on the planet…
Personally, I think Good Mornings get a bad rap for 2 reasons:
- People don’t know how to do them correctly, specifically brace the core during a hip hinge pattern.
- People struggle to accept that these are not meant to be a heavy loaded exercise and let their pride get the best of them.

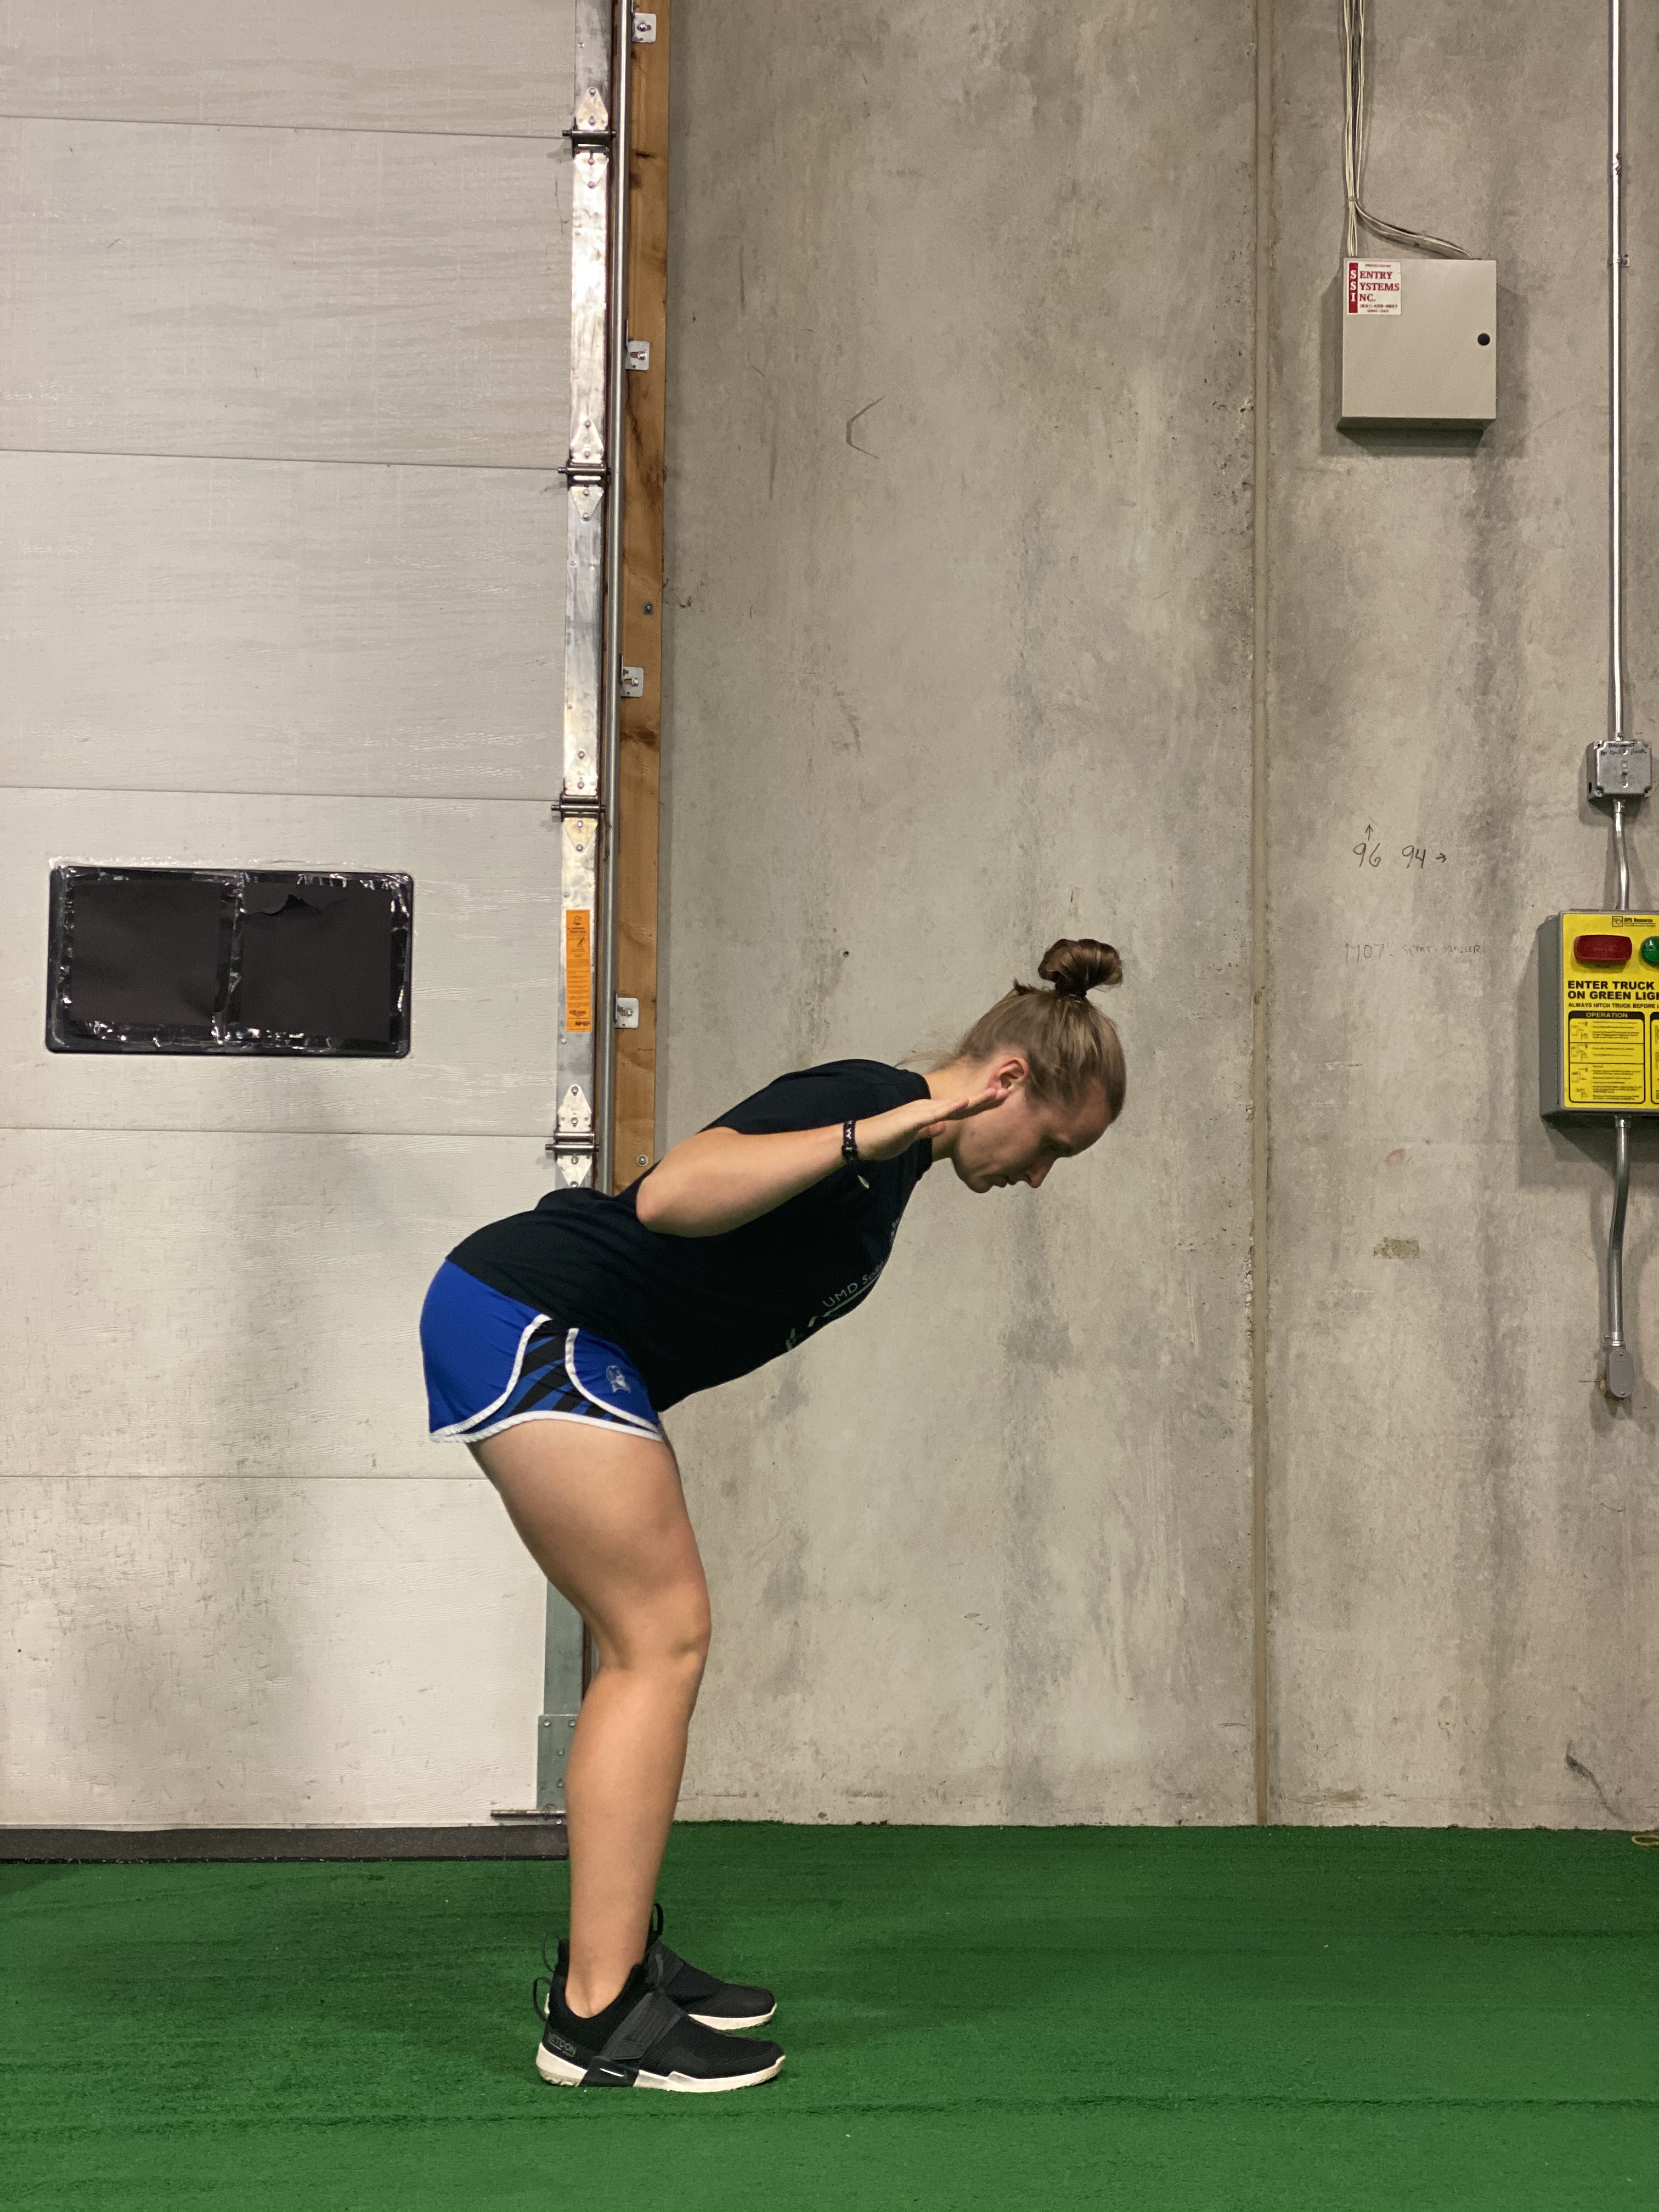
Take a look at these two pictures. While it’s hard to tell from a profile angle, my feet are set at in a hip-width stance. My arms are raised to help assist in the tightening of my upper back, and my spine is in the neutral zone. In the second picture, you can see my chest is parallel to the floor still with the spine in the neutral zone, my hips have been pushed back, and there is a slight bend in the knee.
I love when clients watch my demonstration of a Good Morning and say, “So I just tip over?”
Not quite…
Here are some coaching cues to keep in mind as you just “tip over.”
- Keep your weight evenly distributed throughout the foot in the stance of your choice.
- Reach your hips back (envision pushing your butt back to “Booty Bump” something behind you).
- Keep your shins vertical and a slight bend in the knees.
- Maintain your back in the neutral zone.
- Only go as far as you are able without rounding your back.
Check out a video demonstration HERE!
Now for the fun variations of Good Mornings:

Back Extensions
Deadlifts and Good Mornings are your “bigger” exercises on this list. The remaining exercises of this list are your accessory exercises or the ones that leave that memorable burn during and a few days after
Back extensions again get the occasional bad rap as some people’s incorrect form can leave some long-term damage and back pain.
Now, you might be wondering how a BACK extension gets rid of your cottage cheese thighs…
While it is an exercise primarily used for strengthening the back, it also applies a great deal of work to your hamstrings and glutes. Truthfully, if you look at the movement pattern and biomechanics, it calls much more on the hamstrings and glutes to extend the hips than the back-extensor muscles.


As you can see in this picture, I’ve chosen a horizontal back extension variation. My legs are straight, and in the first picture, I’m bent at the waist perpendicular to the floor. From this position, I press my heels into the back of the apparatus to squeeze the glutes and hamstrings and extend the hips and raise the back.
Here are a few cues you need to keep in mind:
- Align the pad just below the pubic bone or as high on your thighs as possible without interfering with your hip flexion.
- Keep your feet straight set in a hip-width stance.
- Keep your spine within the neutral zone.
- Forcefully press your feet into the surface and hips into the bad.
- Squeeze your glutes maximally to extend the hips to full extension.
There are a few different variations of back extensions, so check out a few here:

Reverse Hypers
The Reverse Hypers are always one of those exercises good for a laugh…
In actuality, Reverse Hypers are Back Extensions in reverse.
That means that instead of your lower body being supported and your upper body moving, your upper body is supported and your lower body is moving.
Reverse Hypers are great for working the entire posterior chain – hamstrings, glutes, and back extensors.


As you can see in these pictures, my upper body is stabilized by 2 large boxes. To begin, I am hinged at the hips with my legs hanging down towards the floor. From this position, I tighten my glutes and hamstrings to raise the legs into the air until parallel with the upper body.
Because this is again an exercise that can lead to injury if not done correctly, here are some coaching cues to keep in mind:
- Lie on a bench, box, or machine with the back in the neutral zone.
- Grab the handles of the bench, box, or machine to tighten the upper back.
- Squeeze your glutes to extend the hips.
- You can keep your legs bent, straight, or spread apart based on your level of comfort and target area.
Now for some Reverse Hyper Variations:

Swings
Love ‘em or hate ‘em Swing variations are great for targeting that undesirable cottage cheese area.
While it’s widely used as a CrossFit, cardiovascular, or HIIT exercise it’s one that should be in your training if you’re looking to lean out your backside.


When you look at the first picture, you can see I’ve hinged at the hips and taken hold of the kettlebell between the legs. My spine is in a neutral zone and my feet are set between a shoulder- and hip-width stance. In the second picture, I’m at the extended position, wherein my hips are at full extension, spine is still in the neutral zone, and the Kettlebell has been swung away from my body.
The one problem with Swing Variations is people tend to get a bit carried away… Hips and back tend to overextend, and Kettlebells end up swinging every which direction. To avoid these silly mistakes, pay attention to these coaching cues:
- Set your feet comfortably between a shoulder- and hip-width distance stance.
- Maintain your head and neck in the neutral zone throughout the entire movement.
- Keep your shins vertical (may vary with heavier loads).
- Keep your arms relaxed, but keep the shoulders pulled back.
- Push your hips back and tilt your torso forward.
- Squeeze the glutes to drive your hips into your forearms to accelerate the weight upward and extend the hips.

Straight Leg Bridges
Straight Leg Bridges are a foundational exercise for training and just so happen to be excellent for getting rid of cottage cheese thighs!
Here are a couple of reasons it’s such a great exercise:
- The contact with the floor aids in protecting the back to reduce risk of injury.
- It’s an excellent primer exercise for bigger exercises like deadlifts.
- They require ZERO equipment, which means they can be done ANYWHERE!


In the picture you can tell I’m set up lying on the floor with my feet elevated on a 14” box. My legs are straight, but my back remains in the neutral zone on the floor. In the second picture, my hips are elevated because I’ve squeezed my glutes and pressed my heels into the box to create hip extension.
There aren’t A LOT of cues associated with the Straight Leg Bridge because it’s a fairly simple exercise, but here are a few to keep in mind.
- Elevate the lower leg on a box or bench.
- Maintain the spine in the neutral zone.
- Press the heels down into the box or bench.
- Squeeze the glutes to extend the hips.
There aren’t TOO MANY variations of this exercise, but check these out:

Knee Flexion
Knee Flexion exercises are your classic hamstring-shredding exercises. These are the exercises you think about when you think about targeting your bowl of cottage cheese…
The problem with these and why they fall so far down on the list is because they only target parts of halves of the hamstrings and don’t require much use of the glutes or back muscles.


In these pictures, I’m performing a prone banded leg curl variation. The band is looped around my heels, and I bend at the knees to curl the heels towards the butt by squeezing the glutes and hamstrings and pressing the knees and hips into the floor.
Since there are SO MANY variations, check out these general cues to utilize as you perform knee flexion exercises:
- Keep your feet straight and curl your heels into the pad or point of support.
- Maintain a slight forward lean from your hips.
- Focus on the lowering phase.
- Move only from your knees and keep your hip angle constant.
Speaking of many variations, check these out:


By the way, did you know that we can put these exercises in your very own training program and get rid of those cottage cheese thighs once and for all?
Apply for a FREE Coaching Call.
We’ll start by talking through what a training program would look like for YOU, identify what’s really holding you back, and see if training with Complete Performance is the right step for YOU!
About The Author

Jordan Davies is the Co-Owner of Complete Performance. Jordan has her B.S. in Exercise Science and Psychology, and her M.A. in Holistic Health Studies. She is a CSCS certified strength and conditioning coach, and a PN-1 and NCI-1 certified nutrition coach. She loves to study how the human body needs to be moved and nourished and making that fit to your unique lifestyle. Click Here Now to Apply for Coaching with Jordan.


